Installing a Tesla Model Y charger at home requires selecting between a hardwired Level 2 Wall Connector (up to 48 amps) or a plug-in 240V NEMA outlet (32 amps), verifying that your main electrical panel has sufficient amperage headroom, running properly rated copper conductors, and complying with National Electrical Code (NEC) continuous load requirements.
This guide details electrical infrastructure requirements, total installation costs, safety standards, and step-by-step setup procedures to ensure safe and efficient charging for your Model Y.
1. Quick Answer: Optimal Tesla Model Y Home Charging Setup
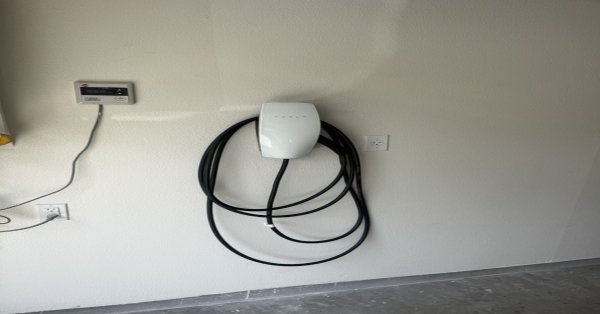
For daily driving, the Tesla Wall Connector hardwired to a dedicated 60-amp circuit represents the optimal setup.
- Maximum Output:48 Amps / 11.5 kW
- Charging Speed:~44 miles of range added per hour
- Electrical Requirement:60A circuit breaker, 6 AWG copper wire (or 4 AWG THHN depending on conduit type/temperature rating), and a 240V split-phase connection.
If you drive under 30 miles daily or rent your home, installing a NEMA 14-50 receptacle on a 50-amp circuit with a Tesla Mobile Connector yields up to 32 Amps (7.7 kW), adding roughly 30 miles of range per hour.
2. Electrical Panel Requirements & Capacity Planning
Installing a Level 2 EV charger adds a continuous heavy load to your residential electrical system. Under NEC Article 625, electric vehicle supply equipment (EVSE) is classified as a continuous load, meaning the circuit breaker and conductors must be rated at 125% of the charger’s maximum current draw.
125% Continuous Load Rule
Installed in Conduit
48A / 11.5 kW Maximum Output
HVAC • Range • Dryer
Amperage & Load Calculations
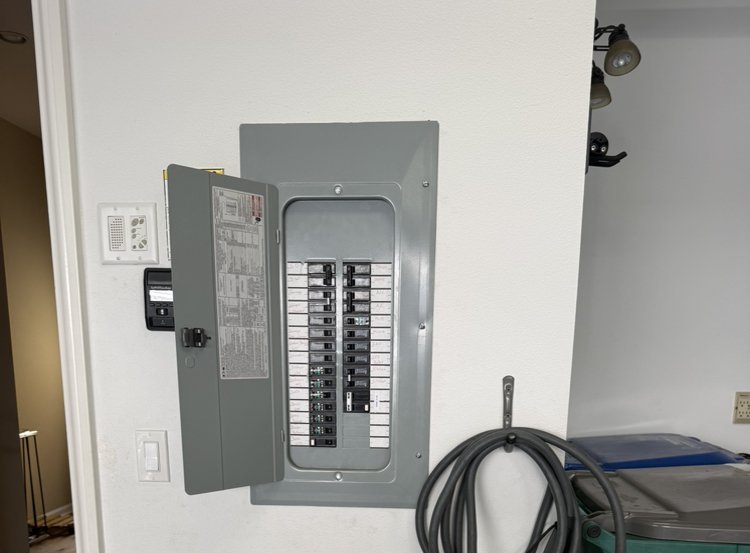
Before mounting hardware, a licensed electrician must perform a load calculation per NEC Article 220 to verify that your panel can handle the extra demand alongside existing high-draw appliances (HVAC units, electric water heaters, ranges, and hot tubs).
| Electrical Panel Capacity | Feasibility for 60A Tesla Charger | Recommended Action |
| 200 Amps or Higher | High Feasibility | Most modern 200A panels have adequate headroom unless loaded with multiple heat pumps or electric kilns. |
| 150 Amps | Moderate Feasibility | Usually supports a 60A circuit if major home appliances use natural gas. Load calculation required. |
| 100 Amps or Lower | Low Feasibility | High risk of overloading. Requires a panel upgrade, a subpanel, or an automated dynamic load management device. |
If your electrical service panel lacks capacity, professional support from team members at Benitex Electric, can determine whether a service upgrade or a smart energy management system is the best approach.
3. Tesla Wall Connector vs. Mobile Connector Comparison
Choosing the right equipment depends on daily commute distance, installation budget, and future vehicle plans.
| Feature / Specification | Tesla Wall Connector (Gen 3) | Tesla Mobile Connector + NEMA 14-50 | Standard 120V Wall Outlet (NEMA 5-15) |
| Charging Level | Level 2 | Level 2 | Level 1 |
| Connection Type | Hardwired | Plug-in (Receptacle) | Standard 3-prong Plug |
| Max Current Draw | 48 Amps | 32 Amps | 12 Amps |
| Circuit Breaker Needed | 60 Amps | 50 Amps | 15 or 20 Amps (Existing) |
| Max Power Output | 11.5 kW | 7.7 kW | 1.4 kW |
| Range Added Per Hour | Up to 44 miles | Up to 30 miles | 2 to 3 miles |
| Hardware Cost | ~$475–$595 | ~$230 + Adapter | Included with early models / ~$230 |
| Smart Features | Wi-Fi, OTA updates, Power Sharing | None | None |
Why Hardwiring Is Superior to NEMA Outlets
While a 240V NEMA 14-50 outlet allows plug-and-play capability, hardwiring a Wall Connector offers distinct engineering benefits:
- Elimination of GFCI Breaker Tripping: NEC 2020/2023 requires GFCI breakers for all 150V-to-ground outdoor and garage receptacles. The Tesla Wall Connector includes built-in DC/AC ground fault detection. Connecting an EVSE with internal GFCI to an upstream GFCI circuit breaker can cause double-tripping issues.
- Thermal Safety: Plug-in receptacles experience thermal expansion and contraction under continuous 32A loads. Budget-grade home-improvement store receptacles can melt under long EV duty cycles. Hardwired terminals remove copper-to-blade friction points entirely.
- Weather Resistance: Hardwired units seal out moisture and dust far better than exposed plug-and-socket configurations, making them ideal for outdoor installations.
4. Hardware Equipment & Wiring Specifications
To meet local electrical codes and ensure maximum performance, verify all conductor sizes, conduit types, and breaker specifications.
2 Hot Legs + Ground • No Neutral
6 AWG THHN/THWN-2 Copper — Conduit Installation
OR
4 AWG NM-B — Non-Metallic Sheathed Cable
60A 2-Pole Circuit Breaker (Non-GFCI, where permitted by applicable code)
Wire Gauge Selection
- 6 AWG Copper (THHN/THWN-2 inside conduit): Rated for 65A at 75°C terminal settings, satisfying the 60A breaker requirement for 48A continuous charging.
- 4 AWG NM-B (Romex): NM-B cable is restricted to the 60°C column (55A limit for 6 AWG). Therefore, if running Romex through walls without conduit, 4 AWG NM-B copper is required to safely support a 60A circuit breaker.
- Grounding: Minimum 10 AWG copper equipment grounding conductor.
5. Step-by-Step Installation Process
Installing a hardwired EV charger requires working with high-voltage electrical panels. Always shut off the main breaker before performing electrical work.
1.Evaluate Load & Obtain Permits: Prerequisite.
Calculate home power usage to confirm service capacity. File for an electrical permit with your local Authority Having Jurisdiction (AHJ) to ensure compliance with municipal building codes.
2.Mount the Wall Connector Wire Bracket: Physical Installation.
Select a mounting location within 24 feet of your Model Y charging port (located on the driver-side rear tail light assembly). Secure the mounting bracket to a wall stud using corrosion-resistant fasteners.
3.Run Conduit & Pull Conductors: Electrical Wire Routing.
Run 3/4-inch EMT or PVC conduit from the main service panel to the charger location. Pull two ungrounded line conductors (L1 and L2) and one ground conductor. Note: The Tesla Wall Connector does not require a neutral wire.
4.Wire Connections & Torque Terminals: Hardware Wiring.
Insert L1, L2, and Ground into the terminal block on the Wall Connector. Using a torque screwdriver, tighten terminal screws precisely to 28 to 35 in-lbs (3.2 to 4.0 Nm) to prevent high-resistance thermal hot spots.
5.Install Breaker & Commission Station: Power-Up & Verification.
Install a dedicated 2-pole 60A breaker into the service panel and land L1, L2, and Ground conductors. Turn on main power, connect to the unit’s Wi-Fi access point via the Tesla One app, and configure the circuit breaker size to 60A (48A output limit).
To verify a successful installation, check that the status LED on the front of the Wall Connector lights up solid green. Plug the cable into your Model Y; the car’s charge port light should pulse green, and the touchscreen should display 48A / 240V (11.5 kW) charging speed.
6. Breakdown of Total Installation Costs
The complete cost to install a Tesla Model Y home charger varies depending on panel proximity, electrical upgrades, and labor rates.
| Cost Category | Typical Price Range | Variables & Drivers |
| Tesla Wall Connector Hardware | $475 – $595 | Standard NACS vs. Universal Wall Connector (with J1772 adapter). |
| Standard Labor & Permit | $500 – $1,200 | Simple runs under 20 feet from panel to charger. |
| Long Conduit Runs / Trenching | $300 – $1,500+ | Distances over 30 feet, dry-wall patching, or underground conduit runs. |
| Main Panel Upgrade (100A to 200A) | $2,000 – $4,500 | Required if panel lacks amperage or physical space. |
| Subpanel Installation | $500 – $1,200 | Needed if the main panel has capacity but no open breaker slots. |
| Estimated Total Project Cost | $975 – $3,500+ | Dependent on home layout and current electrical system age. |
To lower upfront costs, home residential installations in the United States may qualify for the Inflation Reduction Act (Section 30C) Tax Credit, which covers up to 30% of hardware and installation costs (up to $1,000) for eligible census tracts. Local utility rebates may offer additional incentives.
7. Common Installation Content Gaps & Technical Edge Cases
Power Sharing Across Multiple Wall Connectors
If your household charges two electric vehicles, you do not necessarily need a second electrical panel upgrade. Up to six Gen 3 Tesla Wall Connectors can communicate over a shared Wi-Fi network. They dynamically adjust charging speeds so total power output never exceeds the rating of a single circuit breaker.
Solar Integration & Off-Peak Scheduling
By pairing your home charger with the Tesla App, you can schedule charging to start during off-peak utility hours (e.g., 12:00 AM to 6:00 AM) to minimize electricity costs. Homeowners with solar panels can enable settings to charge using excess solar generation before pulling from the power grid.
Consulting certified specialists like the team at Benitex Electric, ensures your home charging setup integrates smoothly with your overall residential system.
Internal Link Opportunities & Strategic Anchors
- Service Page Link: Connect to EV Charger Installation Services using anchor text
professional EV charger installation. - Location Page Link: Connect to local service areas using anchor text
licensed local electricians. - Blog / Educational Content Link: Connect to main panel upgrade guides using anchor text
electrical panel capacity upgrades.
Frequently Asked Questions (FAQs)
Can I plug a Tesla Model Y into a regular 120V wall outlet?
Yes, using a Tesla Mobile Connector with a standard NEMA 5-15 120V adapter. However, this adds only 2 to 3 miles of range per hour, making it practical mainly for low daily mileage or emergency charging.
What size breaker do I need for a Tesla Wall Connector?
For maximum output (48 amps), you need a 60-amp, 2-pole 240V circuit breaker. The Wall Connector can also be adjusted via software to operate on 50A, 40A, 30A, or 20A breakers if panel capacity is limited.
Is a GFCI breaker required for a hardwired Tesla Wall Connector?
No. The Tesla Wall Connector includes built-in ground-fault protection. Installing it on an upstream GFCI circuit breaker can cause double-tripping issues. Standard non-GFCI 2-pole breakers should be used for hardwired setups unless required by local codes.
Can I install a Tesla Model Y charger myself?
While mounting hardware is straightforward, connecting wires directly to a 240V service panel poses severe risks of electrical shock and fire hazard. Hiring a licensed electrician ensures compliance with NEC codes, proper terminal torque settings, and valid insurance coverage.
What wire size is required for a 60A Tesla charger circuit?
Use 6 AWG THHN/THWN-2 copper wire when routing through conduit. If running non-metallic sheathed cable (Romex / NM-B) inside dry wall cavities, 4 AWG NM-B copper is required due to lower temperature rating limits.
How much does it cost to install a Tesla Model Y charger at home?
Total costs range from $975 to $3,500+, including $475 to $595 for the Tesla Wall Connector hardware and $500 to $1,500+ for professional labor, wiring, permits, and panel work.
Ready to upgrade your home charging experience? Reach out to Benitex Electric, for reliable, code-compliant EV charger installations tailored to your electrical system.